We’ve been building Chromaform for photographers who’ve outgrown what mobile editors can do — who’ve reached for a zone system control or a frequency decomposition and found nothing there. v1.0 is feature-complete and heading to TestFlight soon. Here’s what we’re bringing to iPad.
This is a real editing tool, not a filter app. It’s built for the photographer who wants to place Zone III exactly where he wants it, who needs to boost micro-contrast at the third frequency band without touching structure, who wants to match a reference image’s color grade to his foreground while leaving the background untouched. If that sounds like you, keep reading.
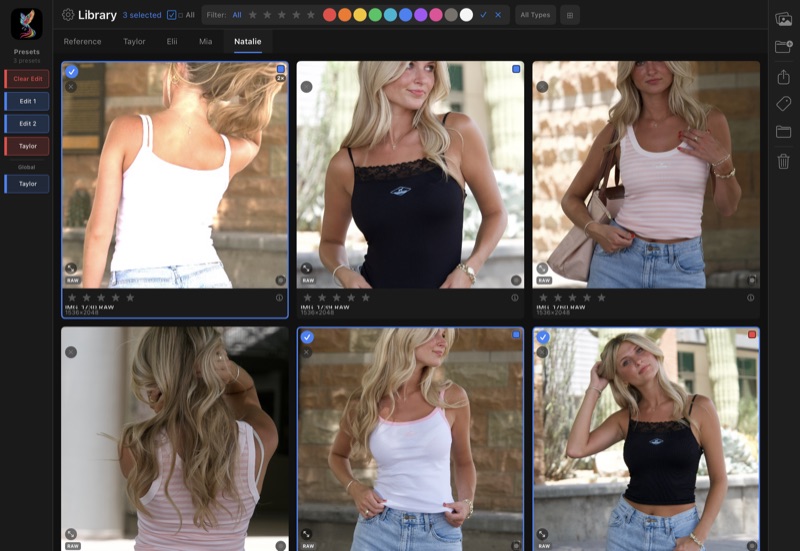
Library with preset pills, project tabs, and color labels
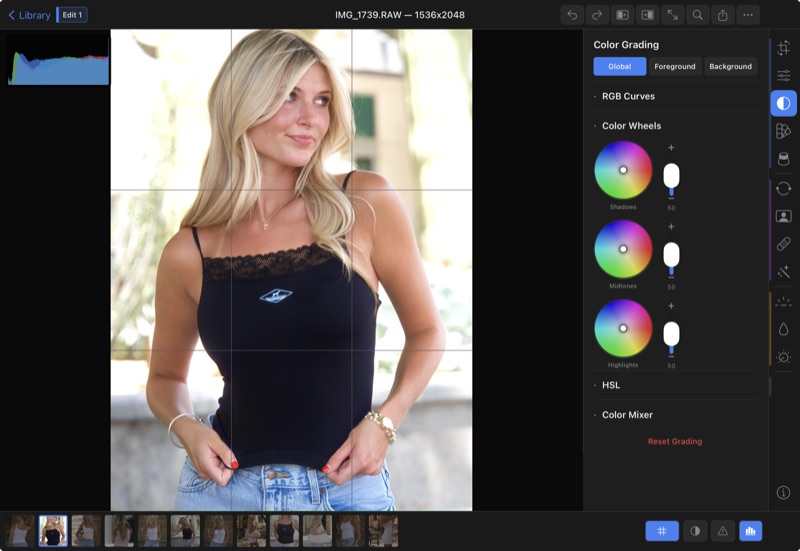
Color grading with Global / Foreground / Background toggle
Film Curve — Not a Tone Curve
Most mobile editors give you a tone curve — a spline you drag around to remap values. Chromaform has that too (with per-channel RGB control and a live histogram), but the real power is in the film curve module.
The film curve is a Weibull parametric scene-to-display transform — the same mathematical model that describes how actual film stock responds to light. It has four controls:
- Light — overall brightness mapping from scene to display
- Contrast — the steepness of the response curve
- Bias — shifts the balance between shadow and highlight rendering
- Chroma — controls how color saturation is preserved through the tonal transform
This runs as a Vulkan compute shader on scene-referred linear data, before any display encoding. The result is a look that has the organic tonal rolloff of real film — compressed highlights that hold color, shadows that open up naturally — rather than the mechanical feel of gamma curves and contrast sliders.
Zone System
Ansel Adams developed the zone system to give photographers precise control over where tones land in a print. Chromaform brings it to digital with a 7-zone luminance mapping — Zones I through VII, from deep shadows to bright highlights.
Each zone can be independently pushed up or down via an interactive bar graph. Want to darken Zone V (midtones) while lifting Zone II (shadow detail) and compressing Zone VII (bright highlights)? Drag three bars. This gives you a level of tonal control that highlight/shadow sliders fundamentally cannot match — because those sliders operate on broad, overlapping ranges, while zone mapping targets specific luminance bands.
Frequency Equalizer
Every image contains detail at multiple spatial scales. Skin pores are fine detail. Facial bone structure is coarse detail. Fabric texture is somewhere in between. The frequency equalizer decomposes the image into 6 independent frequency bands — from coarse structure down to fine micro-detail — plus an edges band.
Each band has its own gain slider, visualized as an interactive bar graph. Boost the third band to add punch to fabric texture. Cut the finest band to smooth skin without losing underlying structure. Boost the edges band to add definition to eyelashes. This is the same wavelet decomposition approach used in professional desktop retouching — and no mobile editor has it.
The Texture control in the main edit panel maps directly to the finest frequency band, so casual edits and deep frequency work use the same underlying pipeline.
Selective Foreground/Background Editing
Every slider, every curve, every color grading control in Chromaform can operate independently on the foreground and background. Not through a masking workflow — through a Global/FG/BG toggle at the top of the edit panel.
Tap “FG” and adjust exposure. Only the subject changes. Tap “BG” and warm the color temperature. Only the environment shifts. The segmentation runs on-device via Apple Vision’s person detection, feathered with a Gaussian blur for smooth transitions, and it persists across sessions — no recomputation when you reopen the image.
This extends to color grading (independent shadow/midtone/highlight wheels per region), the tone curve, and even the match reference system. You can match just the foreground of your image to a reference while leaving the background untouched.
Closed-Loop AI Match
Point Chromaform at a reference image and it will match the look — not with a simple histogram transfer, but through iterative convergence.
The system starts with a neural network (MobileNetV3-Small, running on the Neural Engine via CoreML) that predicts 11 recipe parameters from the reference in a single forward pass. Then it enters a closed loop: render the result, profile it (luminance distribution, RGB channel means, saturation, percentile analysis), compare to the reference profile, and adjust parameters with damped convergence. Up to 8 iterations, with the progress modal showing per-iteration error.
The result is displayed as a match percentage — green above 90%, amber above 70% — with a strength slider to blend from 0% to 100%. And because the system works with the foreground/background separation, you can match just the subject or just the background to different references.
3D Multi-Light with Depth
Add virtual lights to your scene that interact with an AI depth map and person segmentation. Drag to position a spotlight or sunlight source. Each light has controls for color temperature, RGB tint, intensity, softness, spread, and flare.
Because the lights are depth-aware, a rim light placed behind the subject actually illuminates the edges based on the estimated depth geometry. Six presets — Portrait, Key, Rim, Sunlight, Stage, Background — give you starting points, and every parameter is adjustable per light.
Wavelet Portrait Retouching
Professional beauty retouching uses frequency separation — smooth the skin at certain frequency bands while preserving pores and fine detail at others. Chromaform has a 4-band wavelet decomposition (fine, medium, coarse, shape) that operates under a face skin mask from Apple Vision’s face landmarks.
This is the same technique that high-end retouchers use in Photoshop, automated and running entirely on-device. Complementary tools — teeth whitening, eye brightening, eye color shift, hair enhancement, brow darkening, lip color — each operate under their own landmark-derived masks.
Deconvolution Sharpening
Most sharpening tools use unsharp mask — they detect edges and boost contrast around them. It works, but it’s a blunt instrument. Chromaform uses Richardson-Lucy deconvolution, which mathematically reverses the optical blur introduced by the lens.
The difference is that deconvolution actually reconstructs detail that was lost to the point spread function, rather than just making existing edges louder. The result is cleaner, more natural sharpness — especially visible in fine textures like hair, fabric, and foliage.
Dark Channel Dehaze
Chromaform’s dehaze isn’t a contrast boost with a marketing name. It implements the dark channel prior — a physically-based algorithm that estimates atmospheric scattering depth across the image and reverses it. The depth estimation runs as a Vulkan compute shader, and the result preserves color accuracy that global contrast adjustments destroy.
Full Sensor Resolution
A 50-megapixel RAW file has 8192 x 5464 photosites of data. Chromaform processes all of them. For images over 4000px, the pipeline uses tiled rendering — splitting the image into overlapping tiles (256px overlap for neighborhood-aware modules like denoise and local contrast), processing each tile through all 15 Vulkan compute modules, and compositing the result. The progress modal shows tile-by-tile status.
Export preserves this resolution at 16-bit floating point precision in your choice of sRGB, Display P3, or Adobe RGB color space.
The Pipeline
All of this runs through a single Vulkan compute pipeline — 15 GPU shader modules executed in sequence via MoltenVK on Apple’s Metal GPU:
colour → exposure → film curve → local laplacian → frequency EQ → zones → local contrast → dehaze → grade → curves → graduated filter → deconvolution → grain
Each module reads from the previous module’s output and writes to the next. FP16 textures for storage, FP32 math inside each shader. The entire chain executes on the GPU — the CPU’s job is just to set parameters and dispatch work.
Everything Else
There’s a lot more in v1.0 that we haven’t covered in depth:
- Film grain that responds to image luminance like real film — visible in midtones, fading in deep shadows and bright highlights
- Graduated filter simulating physical GND filters with density, position, rotation, and color tint
- HSL color grading with 8 hue tabs plus eyedropper selection, processed as a float32 GPU color cube
- Color mixer — a 3x3 RGB cross-mixing matrix for channel-level color control
- 80+ downloadable film emulation LUTs — Kodak, Fuji, Ilford, Polaroid, sourced from the G’MIC community
- AI denoise via Intel Open Image Denoise, running as 89 Vulkan compute shader stages
- Auto-straighten via Apple Vision horizon detection
- Perspective correction with a 2D keystone pad
- Film negative inversion with orange mask removal for scanning negatives
- Live histogram overlay updated after every render
- Apple Pencil hover on every interactive element, with haptic feedback when sliders cross zero
Coming to TestFlight
We’re wrapping up the final pieces before opening the public beta. If you want to be among the first to try Chromaform, follow this blog — we’ll post the TestFlight link as soon as it’s live.
We’re a small team — Chromaform, Inc., based in Arizona — building the editing tool we wanted to use ourselves. If you’ve ever wished your iPad could do what your desktop can, this is for you.